ALB 背後のプライベートサブネット内の EKS Fargate でコンテナ実行

EKS on Fargate は、プライベートサブネットでコンテナを実行できます。
概要
この投稿の主なポイントは以下です。
- 踏み台を使用して EKS クラスターを操作およびテストする
- VPC エンドポイントを介して ECR および S3 からコンテナイメージをダウンロードする

前提条件
以下をインストールしてください。
VPC
VPC
今回用の VPC を作成してください。
If you use custom DNS domain names defined in a private hosted zone in Amazon Route 53, or use private DNS with interface VPC endpoints (AWS PrivateLink), you must set both the enableDnsHostnames and enableDnsSupport attributes to true.
$ aws ec2 create-vpc \
  --cidr-block 192.168.0.0/16 \
  --tag-specifications "ResourceType=vpc,Tags=[{Key=Name,Value=eks-fargate-vpc}]"

$ aws ec2 modify-vpc-attribute \
  --vpc-id vpc-xxxxxxxxxxxxxxxxx \
  --enable-dns-hostnames
サブネット
Fargate ポッド用の2つのプライベートサブネットと、 EKS クラスターを操作するための踏み台 EC2 インスタンス用の1つのパブリックサブネットを作成してください。
$ aws ec2 create-subnet \
  --vpc-id vpc-xxxxxxxxxxxxxxxxx \
  --availability-zone ap-northeast-1a \
  --cidr-block 192.168.0.0/20 \
  --tag-specifications "ResourceType=subnet,Tags=[{Key=Name,Value=eks-fargate-private-subnet-1a}]"

$ aws ec2 create-subnet \
  --vpc-id vpc-xxxxxxxxxxxxxxxxx \
  --availability-zone ap-northeast-1c \
  --cidr-block 192.168.16.0/20 \
  --tag-specifications "ResourceType=subnet,Tags=[{Key=Name,Value=eks-fargate-private-subnet-1c}]"

$ aws ec2 create-subnet \
  --vpc-id vpc-xxxxxxxxxxxxxxxxx \
  --availability-zone ap-northeast-1a \
  --cidr-block 192.168.32.0/20 \
  --tag-specifications "ResourceType=subnet,Tags=[{Key=Name,Value=eks-fargate-public-subnet-1a}]"
インターネットゲートウェイ
パブリックサブネットにインターネットゲートウェイを作成してください。
$ aws ec2 create-internet-gateway \
  --tag-specifications "ResourceType=internet-gateway,Tags=[{Key=Name,Value=igw-eks-fargate}]"

$ aws ec2 attach-internet-gateway \
  --internet-gateway-id igw-xxxxxxxxxxxxxxxxx \
  --vpc-id vpc-xxxxxxxxxxxxxxxxx
ルートテーブルを作成し、インターネットゲートウェイに関連付けてください。
$ aws ec2 create-route-table \
  --vpc-id vpc-xxxxxxxxxxxxxxxxx \
  --tag-specifications "ResourceType=route-table,Tags=[{Key=Name,Value=rtb-eks-fargate-public}]"

$ aws ec2 create-route \
  --route-table-id rtb-xxxxxxxx \
  --destination-cidr-block 0.0.0.0/0 \
  --gateway-id igw-xxxxxxxxxxxxxxxxx

$ aws ec2 associate-route-table \
  --route-table-id rtb-xxxxxxxx \
  --subnet-id subnet-xxxxxxxxxxxxxxxxx
VPC エンドポイント
EKS プライベートクラスターのために、以下の VPC エンドポイントを作成してください。 region-code は実際のリージョンに置き換えてください。
| Type | Endpoint |
|---|---|
| Interface | com.amazonaws.region-code.ecr.api |
| Interface | com.amazonaws.region-code.ecr.dkr |
| Interface | com.amazonaws.region-code.ec2 |
| Interface | com.amazonaws.region-code.elasticloadbalancing |
| Interface | com.amazonaws.region-code.sts |
| Gateway | com.amazonaws.region-code.s3 |
次の例では、 ap-northeast-1 リージョンを利用しています。
$ aws ec2 create-security-group \
--description "VPC endpoints" \
--group-name eks-fargate-vpc-endpoints-sg \
--vpc-id vpc-xxxxxxxxxxxxxxxxx \
--tag-specifications "ResourceType=security-group,Tags=[{Key=Name,Value=eks-fargate-vpc-endpoints-sg}]"

$ aws ec2 authorize-security-group-ingress \
  --group-id sg-xxxxxxxxxxxxxxxxx \
  --protocol tcp \
  --port 443 \
  --cidr 192.168.0.0/16

$ for name in com.amazonaws.ap-northeast-1.ecr.api com.amazonaws.ap-northeast-1.ecr.dkr com.amazonaws.region-code.ec2 com.amazonaws.ap-northeast-1.elasticloadbalancing com.amazonaws.ap-northeast-1.sts; do \
aws ec2 create-vpc-endpoint \
--vpc-id vpc-xxxxxxxxxxxxxxxxx \
--vpc-endpoint-type Interface \
--service-name $name \
--security-group-ids sg-xxxxxxxxxxxxxxxxx \
--subnet-ids subnet-xxxxxxxxxxxxxxxxx subnet-xxxxxxxxxxxxxxxxx;
done;

$ aws ec2 create-vpc-endpoint \
  --vpc-id vpc-xxxxxxxxxxxxxxxxx \
  --service-name com.amazonaws.ap-northeast-1.s3 \
  --route-table-ids rtb-xxxxxxxxxxxxxxxxx
踏み台 EC2
この投稿では、踏み台 EC2 を介して EKS プライベートクラスターにアクセスします。

If you have disabled public access for your cluster’s Kubernetes API server endpoint, you can only access the API server from within your VPC or a connected network.
インスタンス IAM ロール
インスタンス IAM ロールを作成し、 AmazonSSMManagedInstanceCore のマネージドポリシーをアタッチしてください。これにより、 Session Manager を介して踏み台 EC2 インスタンスに接続できます。
$ echo '{
    "Version": "2012-10-17",
    "Statement": [
        {
            "Effect": "Allow",
            "Principal": {
                "Service": "ec2.amazonaws.com"
            },
            "Action": "sts:AssumeRole"
        }
    ]
}' > policy.json

$ aws iam create-role \
  --role-name eks-fargate-bastion-ec2-role \
  --assume-role-policy-document file://./policy.json

$ aws iam create-instance-profile \
  --instance-profile-name eks-fargate-bastion-ec2-instance-profile

$ aws iam add-role-to-instance-profile \
  --instance-profile-name eks-fargate-bastion-ec2-instance-profile \
  --role-name eks-fargate-bastion-ec2-role

$ aws iam attach-role-policy \
  --role-name eks-fargate-bastion-ec2-role \
  --policy-arn arn:aws:iam::aws:policy/AmazonSSMManagedInstanceCore
以下のポリシーもロールにアタッチしてください。 EC2 インスタンスが EKS, EC2, VPC 等のサービスを設定および操作できるようになります。最小特権のベストプラクティスに従うには、公式ドキュメントをご参照ください。
$ echo '{
    "Version": "2012-10-17",
    "Statement": [
        {
            "Effect": "Allow",
            "Action": [
                "cloudformation:CreateStack",
                "cloudformation:DeleteStack",
                "cloudformation:DescribeStacks",
                "cloudformation:DescribeStackEvents",
                "cloudformation:ListStacks",
                "ec2:*",
                "eks:*",
                "iam:AttachRolePolicy",
                "iam:CreateOpenIDConnectProvider",
                "iam:CreateRole",
                "iam:DetachRolePolicy",
                "iam:DeleteOpenIDConnectProvider",
                "iam:GetOpenIDConnectProvider",
                "iam:GetRole",
                "iam:ListPolicies",
                "iam:PassRole",
                "iam:PutRolePolicy",
                "iam:TagOpenIDConnectProvider"
            ],
            "Resource": "*"
        }
    ]
}' > policy.json

$ aws iam put-role-policy \
  --role-name eks-fargate-bastion-ec2-role \
  --policy-name eks-cluster \
  --policy-document file://./policy.json
EC2 インスタンス起動
踏み台 EC2 インスタンスを起動してください。 AMI ID は公式ドキュメントで確認できます。

$ instanceProfileRole=$( \
aws iam list-instance-profiles-for-role \
  --role-name eks-fargate-bastion-ec2-role \
| jq -r '.InstanceProfiles[0].Arn')

$ aws ec2 run-instances \
  --image-id ami-0bba69335379e17f8 \
  --instance-type t2.micro \
  --iam-instance-profile "Arn=$instanceProfileRole" \
  --subnet-id subnet-xxxxxxxxxxxxxxxxx \
  --associate-public-ip-address \
  --tag-specifications "ResourceType=instance,Tags=[{Key=Name,Value=eks-fargate-bastion-ec2}]"
Session Manager でインスタンスに接続
Session Manager を利用して EC2 インスタンスに接続してください。


接続後、次のコマンドで ec2-user にスイッチしてください。
sh-4.2$ sudo su - ec2-user
AWS CLI 最新化
プリインストールされている AWS CLI を最新バージョンに更新してください。
$ curl "https://awscli.amazonaws.com/awscli-exe-linux-x86_64.zip" -o "awscliv2.zip"
$ unzip awscliv2.zip
$ sudo ./aws/install --bin-dir /usr/local/bin --install-dir /usr/local/aws-cli --update
kubectl インストール
踏み台 EC2 インスタンスに kubectl をインストールしてください。
$ curl -o kubectl https://s3.us-west-2.amazonaws.com/amazon-eks/1.24.7/2022-10-31/bin/linux/amd64/kubectl
  % Total    % Received % Xferd  Average Speed   Time    Time     Time  Current
                                 Dload  Upload   Total   Spent    Left  Speed
100 43.6M  100 43.6M    0     0  4250k      0  0:00:10  0:00:10 --:--:-- 4602k

$ chmod +x ./kubectl
$ mkdir -p $HOME/bin && cp ./kubectl $HOME/bin/kubectl && export PATH=$PATH:$HOME/bin
$ echo 'export PATH=$PATH:$HOME/bin' >> ~/.bashrc
$ kubectl version --short --client
Flag --short has been deprecated, and will be removed in the future. The --short output will become the default.
Client Version: v1.24.7-eks-fb459a0
Kustomize Version: v4.5.4
eksctl インストール
踏み台 EC2 インスタンスに eksctl をインストールしてください。
$ curl --silent --location "https://github.com/weaveworks/eksctl/releases/latest/download/eksctl_$(uname -s)_amd64.tar.gz" | tar xz -C /tmp
$ sudo mv /tmp/eksctl /usr/local/bin
$ eksctl version
0.123.0
EKS
クラスター
--fargate オプションを指定して、 EKS クラスターを作成してください。
$ eksctl create cluster \
  --name eks-fargate-cluster \
  --region ap-northeast-1 \
  --version 1.24 \
  --vpc-private-subnets subnet-xxxxxxxxxxxxxxxxx,subnet-xxxxxxxxxxxxxxxxx \
  --without-nodegroup \
  --fargate

$ kubectl get svc
NAME         TYPE        CLUSTER-IP   EXTERNAL-IP   PORT(S)   AGE
kubernetes   ClusterIP   10.100.0.1   <none>        443/TCP   20m
kubectl get svc コマンドを実行する際に以下のようなエラーが発生した場合は、 AWS CLI を最新バージョンに更新してください。
$ kubectl get svc
Unable to connect to the server: getting credentials: decoding stdout: no kind "ExecCredential" is registered for version "client.authentication.k8s.io/v1alpha1" in scheme "pkg/client/auth/exec/exec.go:62"

$ curl "https://awscli.amazonaws.com/awscli-exe-linux-x86_64.zip" -o "awscliv2.zip"
$ unzip awscliv2.zip
$ sudo ./aws/install --bin-dir /usr/local/bin --install-dir /usr/local/aws-cli --update

$ kubectl get svc
NAME         TYPE        CLUSTER-IP   EXTERNAL-IP   PORT(S)   AGE
kubernetes   ClusterIP   10.100.0.1   <none>        443/TCP   20m
kubectl get svc コマンドを実行する際に以下のようなエラーが発生した場合は、次のコマンドを使用して .kube/config ファイルを更新してみてください。
$ kubectl get svc
The connection to the server localhost:8080 was refused - did you specify the right host or port?

$ aws eks update-kubeconfig \
  --region ap-northeast-1 \
  --name eks-fargate-cluster

$ kubectl get svc
NAME         TYPE        CLUSTER-IP   EXTERNAL-IP   PORT(S)   AGE
kubernetes   ClusterIP   10.100.0.1   <none>        443/TCP   20m
IAM ユーザーとロール追加
クラスターにアクセス不能にならないよう、 IAM ユーザーやロールを EKS クラスターに追加することが、公式ドキュメントで推奨されています。
The IAM user or role that created the cluster is the only IAM entity that has access to the cluster. Grant permissions to other IAM users or roles so they can access your cluster.
例えば、以下のコマンドで IAM ユーザーを system:masters に追加できます。
$ eksctl create iamidentitymapping \
  --cluster eks-fargate-cluster \
  --region=ap-northeast-1 \
  --arn arn:aws:iam::000000000000:user/xxxxxx \
  --group system:masters \
  --no-duplicate-arns
Private クラスターエンドポイント有効化
Private クラスターエンドポイントを有効化してください。
$ aws eks update-cluster-config \
  --region ap-northeast-1 \
  --name eks-fargate-cluster \
  --resources-vpc-config endpointPublicAccess=false,endpointPrivateAccess=true
VPC からのトラフィックを許可するために、 HTTPS (443) のインバウンドルールを追加してください。
You must ensure that your Amazon EKS control plane security group contains rules to allow ingress traffic on port 443 from your bastion host.
$ sgId=$(aws eks describe-cluster --name eks-fargate-cluster | jq -r .cluster.resourcesVpcConfig.clusterSecurityGroupId)
$ aws ec2 authorize-security-group-ingress \
  --group-id $sgId \
  --protocol tcp \
  --port 443 \
  --cidr 192.168.0.0/16
踏み台 EC2 インスタンスと EKS クラスター間の接続をテストしてください。
$ kubectl get svc
NAME         TYPE        CLUSTER-IP   EXTERNAL-IP   PORT(S)   AGE
kubernetes   ClusterIP   10.100.0.1   <none>        443/TCP   153m
Fargate プロファイル
サンプルのアプリケーション用に Fargate プロファイルを作成してください。
$ eksctl create fargateprofile \
  --region ap-northeast-1 \
  --cluster eks-fargate-cluster  \
  --name fargate-app-profile \
  --namespace fargate-app
AWS Load Balancer Controller
AWS Load Balancer Controller をインストールして、アプリケーションのコンテナを Application Load Balancer (ALB) の背後で実行します。
クラスター用 IAM OIDC プロバイダー
以下のコマンドを実行して、クラスター用の IAM OIDC プロバイダーを作成してください(未作成の場合)。
$ oidc_id=$(aws eks describe-cluster --name eks-fargate-cluster --query "cluster.identity.oidc.issuer" --output text | cut -d '/' -f 5)
$ aws iam list-open-id-connect-providers | grep $oidc_id

# If no response, run the following command.
$ eksctl utils associate-iam-oidc-provider \
  --region ap-northeast-1 \
  --cluster eks-fargate-cluster \
  --approve
IAM Service Account
AWS Load Balancer Controller 用に IAM Service Account を作成してください。
$ curl -o iam_policy.json https://raw.githubusercontent.com/kubernetes-sigs/aws-load-balancer-controller/v2.4.4/docs/install/iam_policy.json

$ aws iam create-policy \
  --policy-name AWSLoadBalancerControllerIAMPolicy \
  --policy-document file://iam_policy.json

$ eksctl create iamserviceaccount \
  --region ap-northeast-1 \
  --cluster=eks-fargate-cluster \
  --namespace=kube-system \
  --name=aws-load-balancer-controller \
  --role-name "AmazonEKSLoadBalancerControllerRole" \
  --attach-policy-arn=arn:aws:iam::111122223333:policy/AWSLoadBalancerControllerIAMPolicy \
  --approve
Add-on インストール
AWS Load Balancer Controller Add-on をセットアップするために、 Helm v3 をインストールしてください。
If you want to deploy the controller on Fargate, use the Helm procedure.
$ curl https://raw.githubusercontent.com/helm/helm/master/scripts/get-helm-3 > get_helm.sh
chmod 700 get_helm.sh
./get_helm.sh
$ helm version --short | cut -d + -f 1
v3.10.3
AWS Load Balancer Controller Add-on をインストールしてください。 ECR リポジトリの URL は公式ドキュメントで確認できます。
enableShield=false, enableWaf=false, および enableWafv2=false を追加する必要があります。詳細については、公式ドキュメントをご参照ください。 When deploying it, you should use command line flags to set enable-shield, enable-waf, and enable-wafv2 to false. Certificate discovery with hostnames from Ingress objects isn’t supported. This is because the controller needs to reach AWS Certificate Manager, which doesn’t have a VPC interface endpoint.
$ helm repo add eks https://aws.github.io/eks-charts
$ helm repo update
$ helm install aws-load-balancer-controller eks/aws-load-balancer-controller \
  -n kube-system \
  --set region=ap-northeast-1 \
  --set vpcId=vpc-xxxxxxxxxxxxxxxxx \
  --set image.repository=602401143452.dkr.ecr.ap-northeast-1.amazonaws.com/amazon/aws-load-balancer-controller \
  --set clusterName=eks-fargate-cluster \
  --set serviceAccount.create=false \
  --set serviceAccount.name=aws-load-balancer-controller \
  --set enableShield=false \
  --set enableWaf=false \
  --set enableWafv2=false

$ kubectl get deployment -n kube-system aws-load-balancer-controller
NAME                           READY   UP-TO-DATE   AVAILABLE   AGE
aws-load-balancer-controller   2/2     2            2           105s
Subnets にタグ付け
プライベートサブネットに kubernetes.io/role/internal-elb: 1 のタグを付けてください。これにより、 Kubernetes と AWS Load Balancer Controller が利用可能なサブネットを識別できます。
Must be tagged in the following format. This is so that Kubernetes and the AWS load balancer controller know that the subnets can be used for internal load balancers.
$ aws ec2 create-tags \
  --resources subnet-xxxxxxxxxxxxxxxxx subnet-xxxxxxxxxxxxxxxxx \
  --tags Key=kubernetes.io/role/internal-elb,Value=1
サンプルアプリケーションのデプロイ
FastAPI サンプルアプリケーション
この投稿では、 API を構築するために FastAPI を利用します。
ディレクトリ構成
/
├── src
│   ├── __init__.py
│   ├── main.py
│   └── requirements.txt
└── Dockerfile
requirements.txt
以下の内容で requirements.txt を作成してください。
anyio==3.6.2
click==8.1.3
fastapi==0.88.0
h11==0.14.0
httptools==0.5.0
idna==3.4
pydantic==1.10.2
python-dotenv==0.21.0
PyYAML==6.0
sniffio==1.3.0
starlette==0.22.0
typing_extensions==4.4.0
uvicorn==0.20.0
uvloop==0.17.0
watchfiles==0.18.1
websockets==10.4
main.py
以下のコードで main.py を作成してください。
from fastapi import FastAPI

app = FastAPI()


@app.get('/')
def read_root():
    return {'message': 'Hello world!'}
Dockerfile
以下の内容で Dockerfile を作成してください。
FROM python:3.10-alpine@sha256:d8a484baabf7d2337d34cdef6730413ea1feef4ba251784f9b7a8d7b642041b3
COPY ./src ./
RUN pip install --no-cache-dir -r requirements.txt
CMD ["uvicorn", "main:app", "--host", "0.0.0.0", "--port", "80"]
ECR にイメージをプッシュ
イメージをビルドして、 ECR リポジトリにプッシュしてください。以下の例では、 api という名前のリポジトリを作成しています。
$ aws ecr create-repository --repository-name api
$ uri=$(aws ecr describe-repositories | jq -r '.repositories[] | select(.repositoryName == "api") | .repositoryUri')
$ aws ecr get-login-password --region ap-northeast-1 | docker login --username AWS --password-stdin 000000000000.dkr.ecr.ap-northeast-1.amazonaws.com
$ docker build .
$ docker tag xxxxxxxxxxxx $uri\:latest
$ docker push $uri\:latest
Fargate へデプロイ
fargate-app.yaml を作成してください。 AWS Load Balancer Controller v2.4 の仕様についての詳細は、公式ドキュメントをご参照ください。
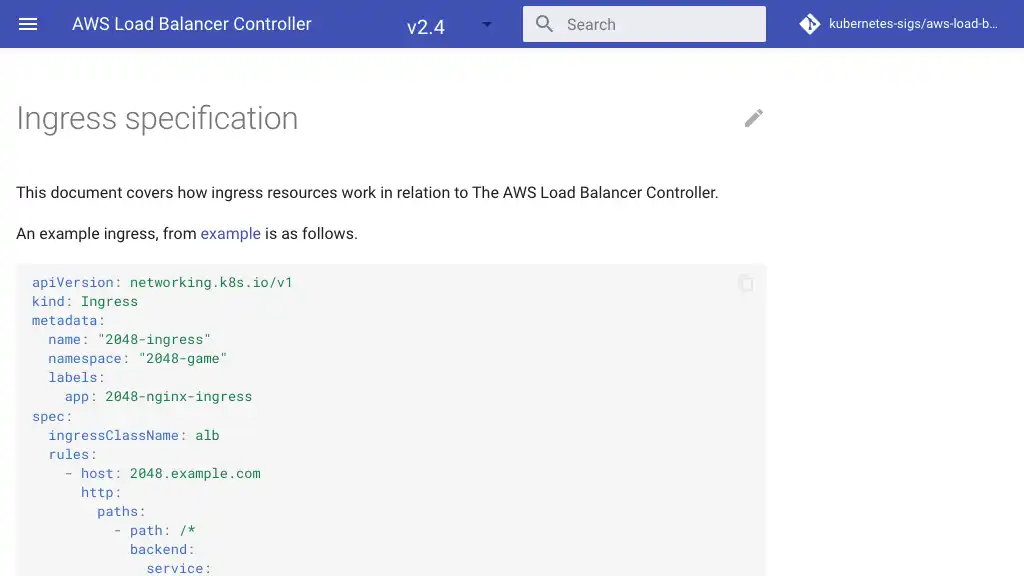
000000000000.dkr.ecr.ap-northeast-1.amazonaws.com/api:latest を実際のイメージ URI に置き換えてください。
---
apiVersion: v1
kind: Namespace
metadata:
  name: fargate-app
---
apiVersion: apps/v1
kind: Deployment
metadata:
  name: fargate-app-deployment
  namespace: fargate-app
  labels:
    app: api
spec:
  replicas: 1
  selector:
    matchLabels:
      app: api
  template:
    metadata:
      labels:
        app: api
    spec:
      affinity:
        nodeAffinity:
          requiredDuringSchedulingIgnoredDuringExecution:
            nodeSelectorTerms:
              - matchExpressions:
                - key: kubernetes.io/arch
                  operator: In
                  values:
                    - amd64
      containers:
        - name: api
          image: 000000000000.dkr.ecr.ap-northeast-1.amazonaws.com/api:latest
          imagePullPolicy: IfNotPresent
          ports:
            - name: http
              containerPort: 80
      nodeSelector:
        kubernetes.io/os: linux
---
apiVersion: v1
kind: Service
metadata:
  name: fargate-app-service
  namespace: fargate-app
  labels:
    app: api
spec:
  selector:
    app: api
  ports:
    - protocol: TCP
      port: 80
      targetPort: 80
  type: NodePort
---
apiVersion: networking.k8s.io/v1
kind: Ingress
metadata:
  name: fargate-app-ingress
  namespace: fargate-app
  annotations:
    alb.ingress.kubernetes.io/scheme: internal
    alb.ingress.kubernetes.io/target-type: ip
spec:
  ingressClassName: alb
  rules:
    - http:
        paths:
          - path: /
            pathType: Prefix
            backend:
              service:
                name: fargate-app-service
                port:
                  number: 80
kubectl apply コマンドを使用して、マニフェストファイルをクラスターに適用してください。
$ kubectl apply -f fargate-app.yaml
リソースをチェックしてください。
$ kubectl get all -n fargate-app
NAME                                          READY   STATUS    RESTARTS   AGE
pod/fargate-app-deployment-6db55f9b7b-4hp8z   1/1     Running   0          55s

NAME                          TYPE       CLUSTER-IP      EXTERNAL-IP   PORT(S)        AGE
service/fargate-app-service   NodePort   10.100.190.97   <none>        80:31985/TCP   6m

NAME                                     READY   UP-TO-DATE   AVAILABLE   AGE
deployment.apps/fargate-app-deployment   1/1     1            1           6m

NAME                                                DESIRED   CURRENT   READY   AGE
replicaset.apps/fargate-app-deployment-6db55f9b7b   1         1         1       6m
API テスト
以下のコマンドを実行し、 ALB の DNS 名を Address フィールドで確認してください。
$ kubectl describe ingress -n fargate-app fargate-app-ingress
Name:             fargate-app-ingress
Labels:           <none>
Namespace:        fargate-app
Address:          internal-k8s-fargatea-fargatea-0579eb4ce2-1731550123.ap-northeast-1.elb.amazonaws.com
Ingress Class:    alb
Default backend:  <default>
Rules:
  Host        Path  Backends
  ----        ----  --------
  *
              /   fargate-app-service:80 (192.168.4.97:80)
Annotations:  alb.ingress.kubernetes.io/scheme: internal
              alb.ingress.kubernetes.io/target-type: ip
Events:
  Type    Reason                  Age    From     Message
  ----    ------                  ----   ----     -------
  Normal  SuccessfullyReconciled  4m17s  ingress  Successfully reconciled
curl を使用して ALB の DNS にリクエストを送信してください。 FastAPI からのレスポンスが表示されるはずです。
$ curl internal-k8s-fargatea-fargatea-xxxxxxxxxx-xxxxxxxxxx.ap-northeast-1.elb.amazonaws.com
{"message":"Hello world!"}
EKS クラスター削除
EKS クラスターを削除してください。この投稿で作成した他のリソースが不要であれば、それらも削除してください。
$ kubectl delete -f fargate-app.yaml
$ helm uninstall aws-load-balancer-controller eks/aws-load-balancer-controller -n kube-system

$ arn=$(aws iam list-policies --scope Local \
| jq -r '.Policies[] | select(.PolicyName == "AWSLoadBalancerControllerIAMPolicy").Arn')
$ aws iam detach-role-policy \
  --role-name AmazonEKSLoadBalancerControllerRole \
  --policy-arn $arn

$ eksctl delete iamserviceaccount \
  --region ap-northeast-1 \
  --cluster eks-fargate-cluster \
  --namespace kube-system \
  --name aws-load-balancer-controller

$ aws eks delete-fargate-profile \
  --cluster-name eks-fargate-cluster \
  --fargate-profile-name fargate-app-profile

$ aws eks delete-fargate-profile \
  --cluster-name eks-fargate-cluster \
  --fargate-profile-name fp-default

$ arn=$(aws iam list-policies --scope AWS \
| jq -r '.Policies[] | select(.PolicyName == "AmazonEKSFargatePodExecutionRolePolicy").Arn')
$ aws iam detach-role-policy \
  --role-name eksctl-eks-fargate-cluster-FargatePodExecutionRole-xxxxxxxxxxxxx \
  --policy-arn $arn

$ eksctl delete cluster \
  --region ap-northeast-1 \
  --name eks-fargate-cluster
AWS Load Balancer Controller Ingress の削除中に問題が発生した場合は、次のコマンドを使用してファイナライザーを削除してみてください。
$ kubectl patch ingress fargate-app-ingress -n fargate-app -p '{"metadata":{"finalizers":[]}}' --type=merge