SageMaker Object Detection Built-in Algorithm を利用した計数ソリューション

オブジェクト検出アルゴリズムは、オブジェクトの計数に効果的であり、 SageMaker にはいくつかの組み込みアルゴリズムがあります。この投稿では、以下の手順で使用方法を説明します。
- Ground Truth を使用した画像のラベリング
- モデルの訓練とデプロイ
- 推論実行
概要
個人的な意見として、本番ワークロードで直接 SageMaker 推論エンドポイントを使用すべきではありません。この投稿では、テスト目的で使用しています。
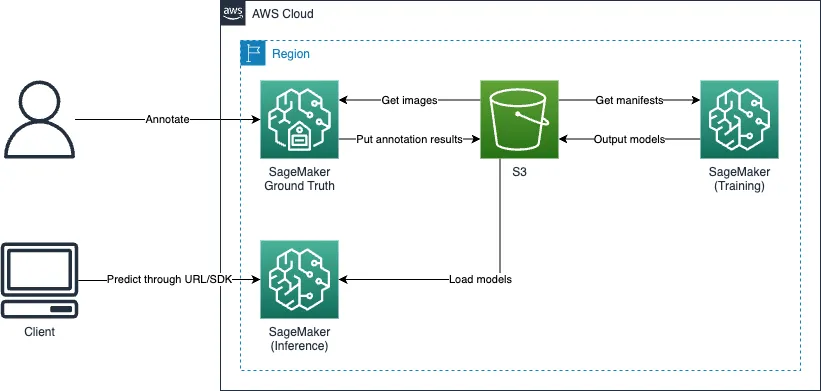
Ground Truth を使用したラベリング
Ground Truth は、ラベリング機能を提供します。
ラベリングジョブ作成
以下のステップに従って、ラベリングジョブを作成してください。
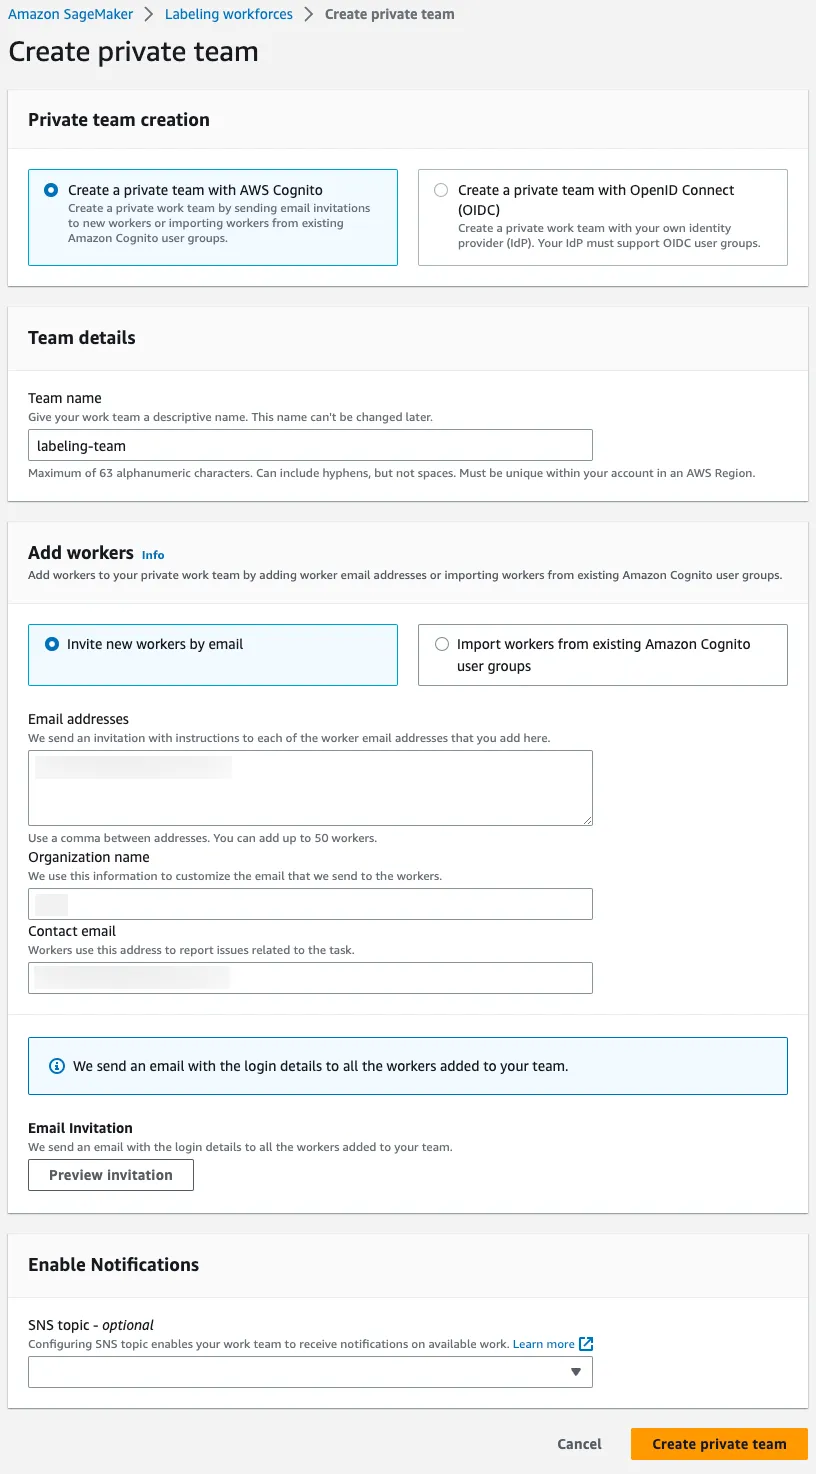
ラベリングワークフォース作成
最初に、ラベリングワークフォースを作成してください。この投稿では、プライベートチームを作成します。チームメンバーは Cognito または OIDC のいずれかで認証も可能です。
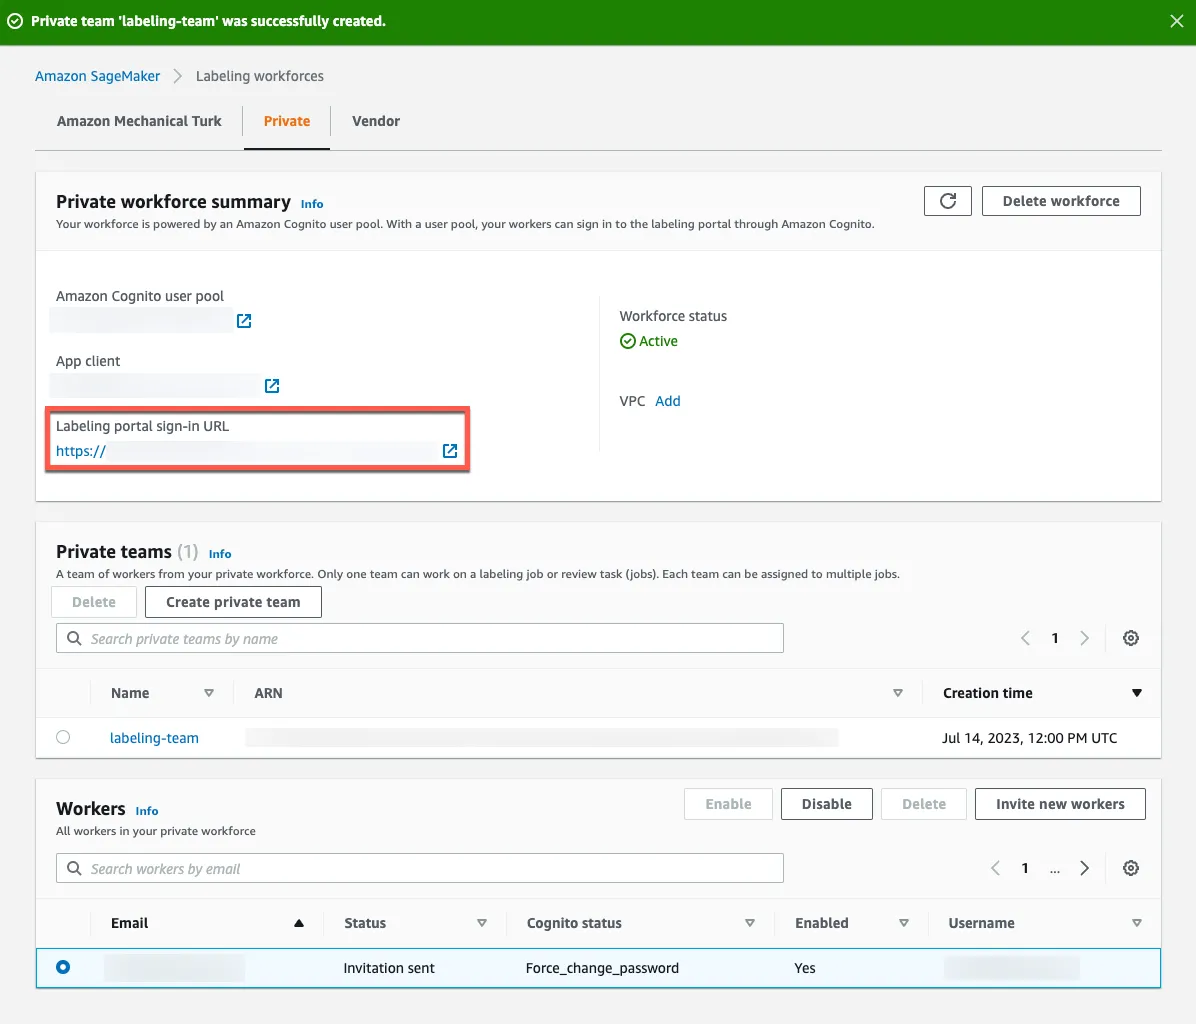
作業者に招待メールが送信され、ラベリングポータルの URL が記載されています。その URL を使用して、ラベリングポータルにサインアップおよびサインインできます。マネジメントコンソールで Private workforce summary > Labeling portal sign-in URL に移動することで、 URL を確認することもできます。
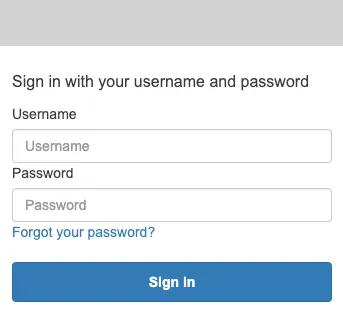
ラベリングポータルにサインアップおよびサインイン
作業者は招待メールで提供された情報を使用して、ラベリングポータルにサインアップおよびサインインする必要があります。
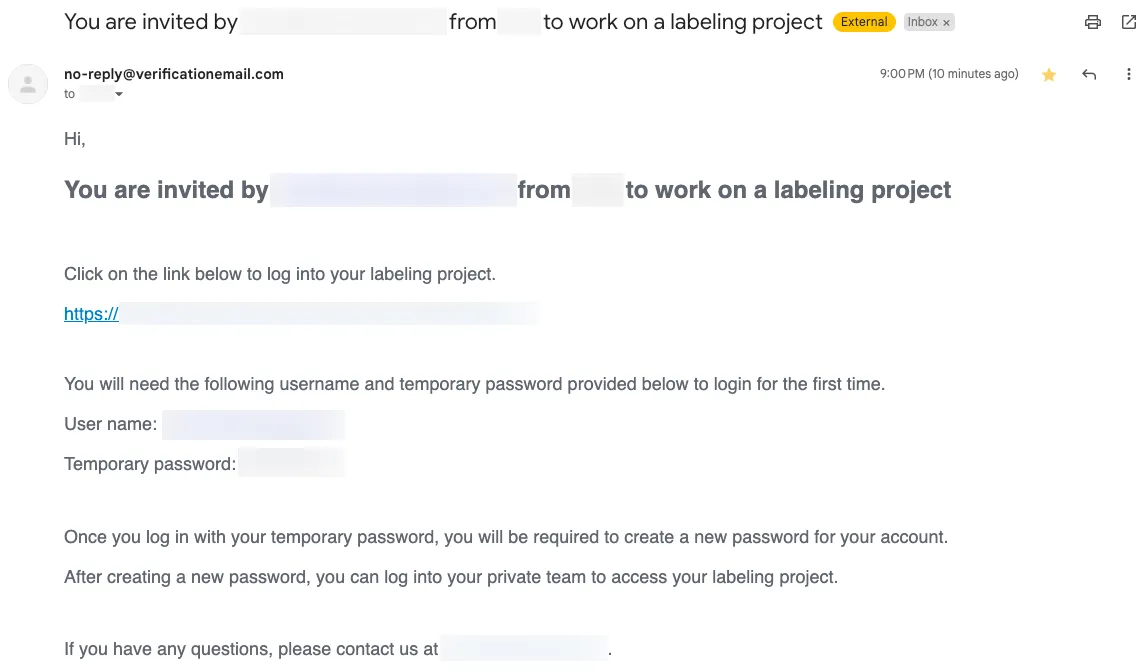
Hi,

You are invited by [email protected] from <COMPANY> to work on a labeling project

Click on the link below to log into your labeling project.
"https://<LABELING_PORTAL_URL>"

You will need the following username and temporary password provided below to login for the first time.
User name: <USER_NAME>
Temporary password: <PASSWORD>

Once you log in with your temporary password, you will be required to create a new password for your account.
After creating a new password, you can log into your private team to access your labeling project.

If you have any questions, please contact us at [email protected].
URL にアクセスし、招待メールに記載された username と password を入力してください。
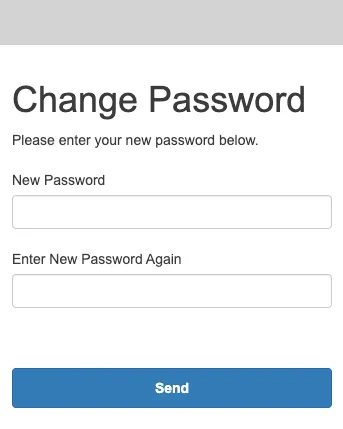
仮パスワードを変更してください。
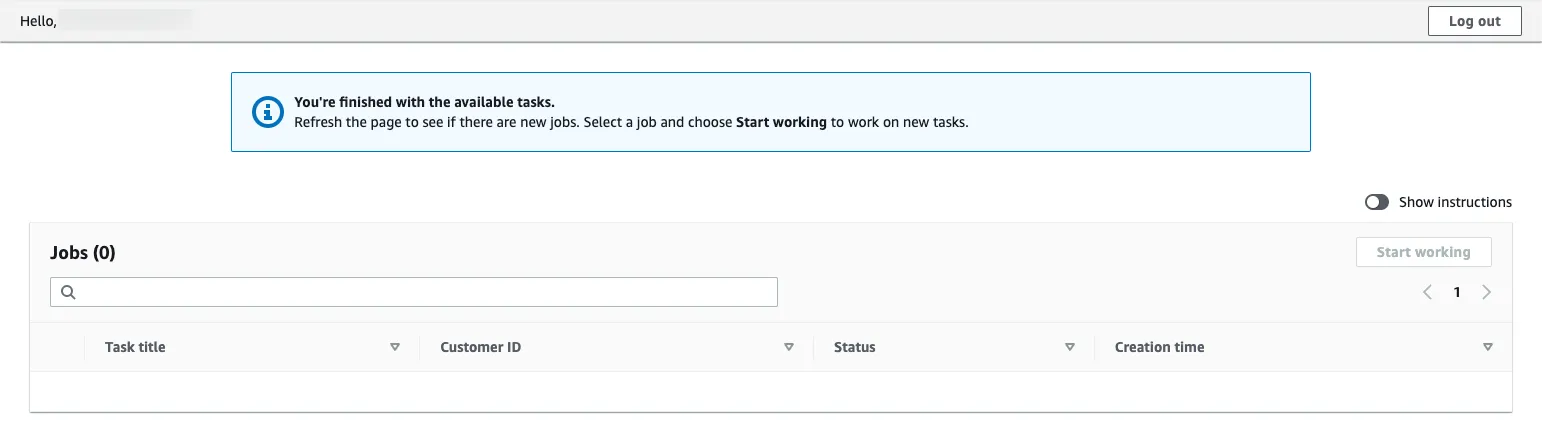
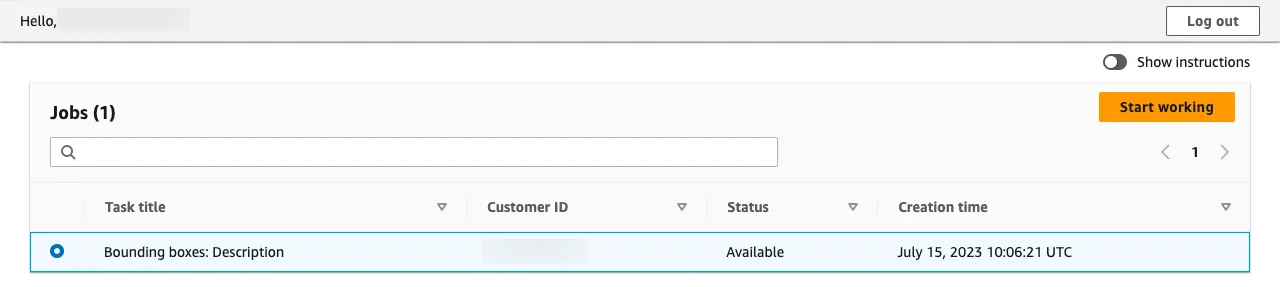
トップページにリダイレクトされます。このページでは、割り当てられたラベリングジョブがリストされます。
ラベリングジョブ作成
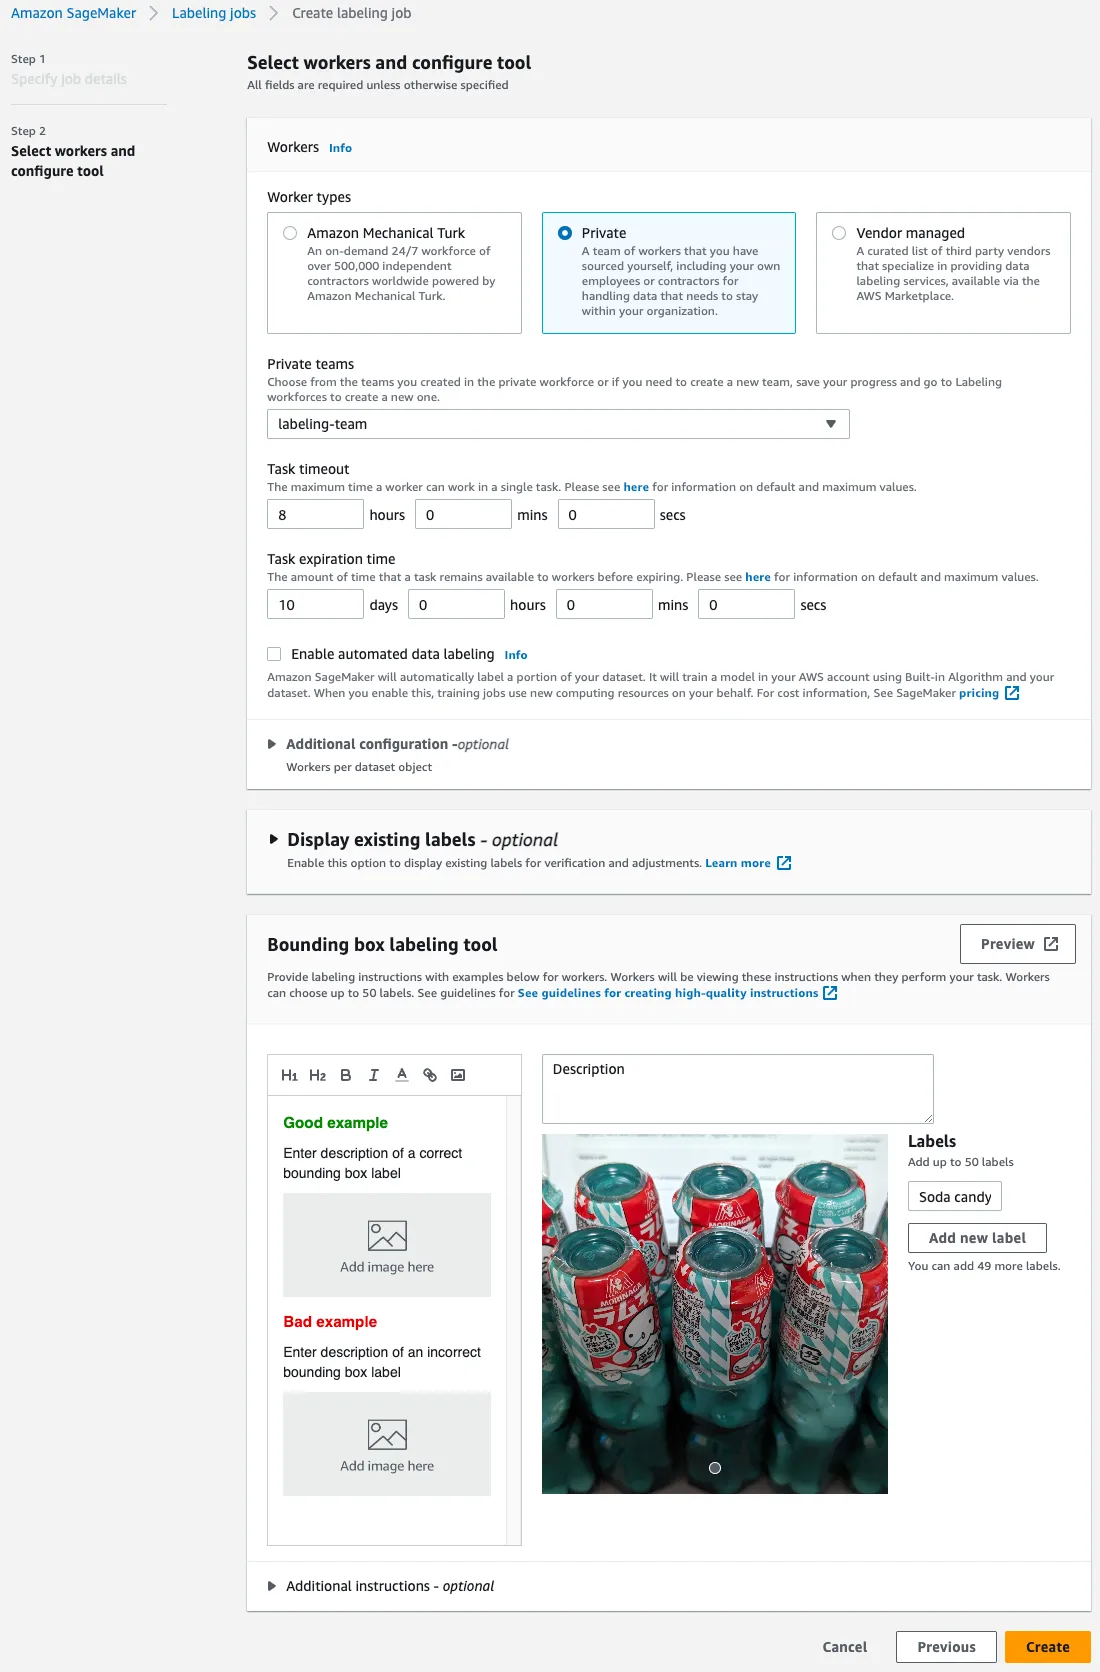
SageMaker マネジメントコンソールに切り替え、ラベリングジョブの作成を開始し、以下の画像に従って値を入力してください。作成後、ラベリングジョブを削除することはできないため、 uuidgen | tr "[:upper:]" "[:lower:]" のように生成された一意の値を使用すると良いでしょう。 Complete data setup を忘れずにクリックしてください。

複雑なラベリングタスクを扱う場合、 Task timeout に長い値を指定する方が良いかもしれません。
ラベリング開始
ラベリングポータルにサインインしたら、上記で作成したラベリングジョブが表示されるはずです。 Start working ボタンをクリックしてください。
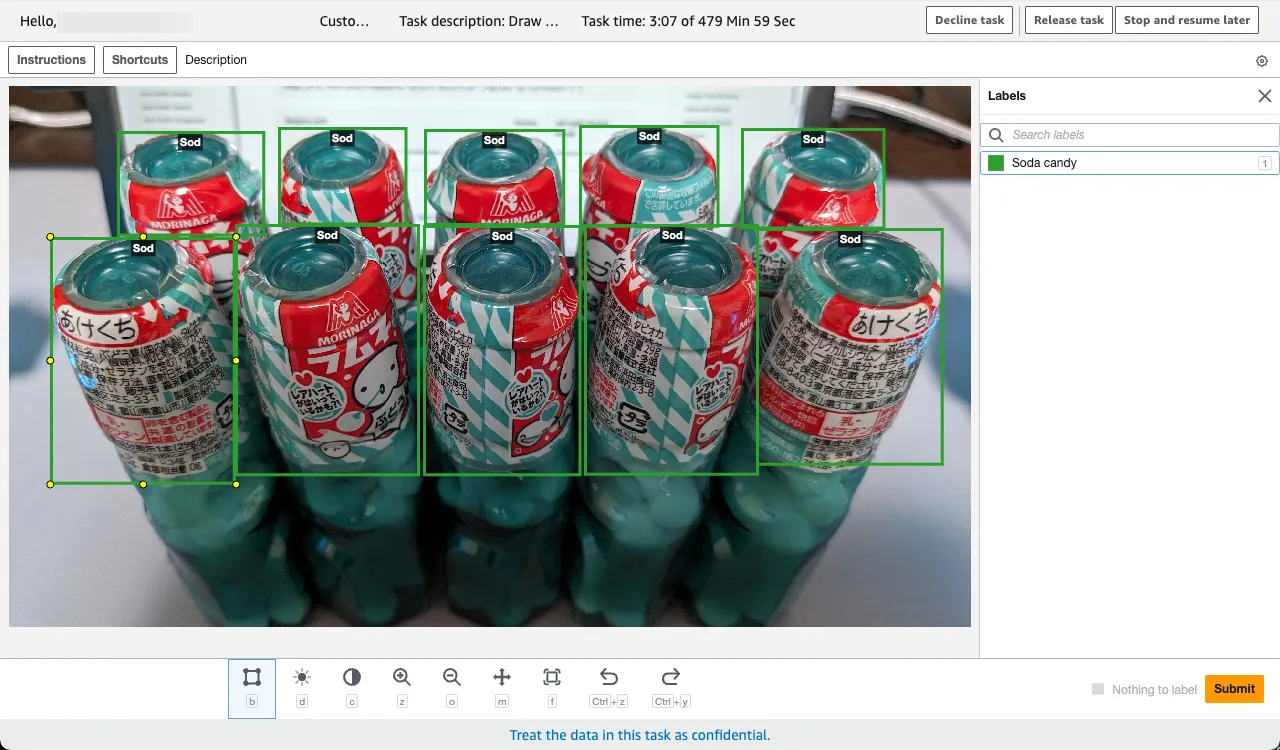
ジョブの説明に従って、データセットをラベリングしてください。以下は例です。
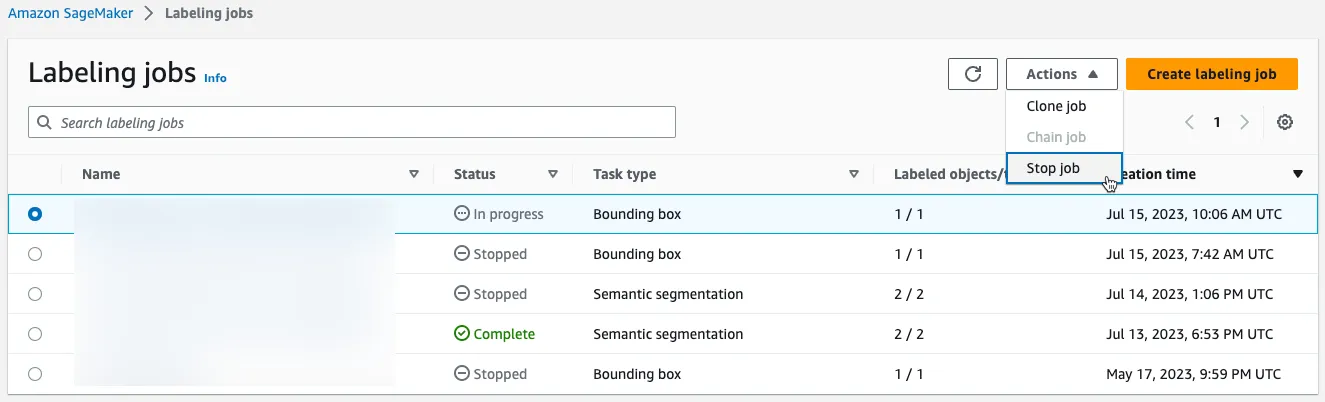
全ての作業者がラベリングジョブを完了したら、ジョブを停止してください。
ラベリング出力
ディレクトリ
ラベリングジョブを停止したら、最終的な出力が、指定された S3 バケットに生成されています。オブジェクト検出タスクの場合、 manifests/output/output.manifest が重要です。
<YOUR_OUTPUT_PATH>/
|-- annotation-tool/
|-- annotations/
|   |-- consolidated-annotation/
|   `-- worker-response/
|-- manifests/
|   |-- intermediate/
|   `-- output/
|       `-- output.manifest
`-- temp/
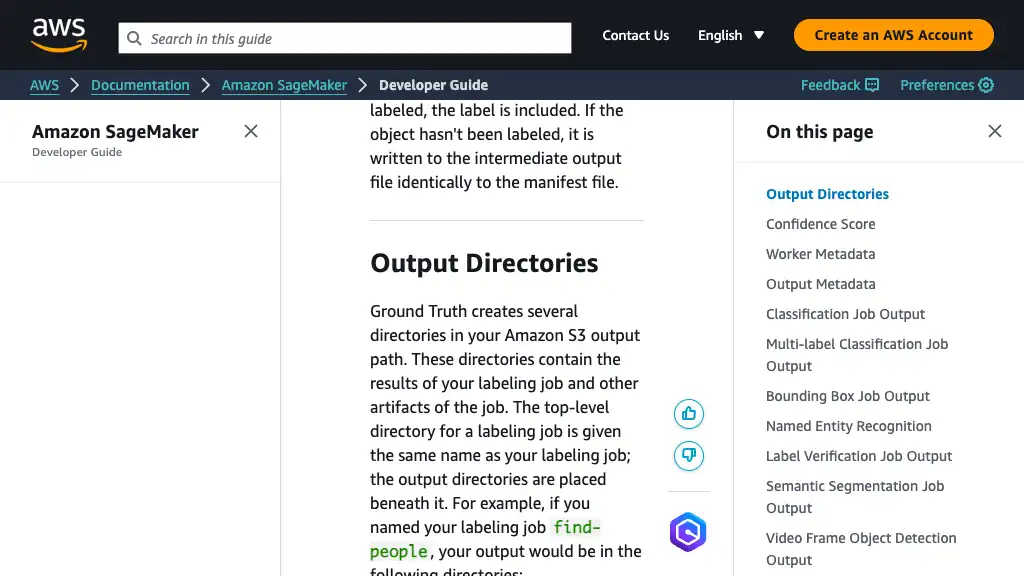
Ground Truth は、拡張マニフェスト形式でラベリング結果を生成します。詳細については、公式ドキュメントをご参照ください。
SageMaker を利用した訓練
訓練
ラベリングが完了したら、 SageMaker コンソールを使用してモデルを訓練してください。
重要なフィールドは以下の通りです。
- Job settings
- Job name
- 訓練ジョブは作成後に削除できないため、
uuidgen | tr "[:upper:]" "[:lower:]"のように生成された一意の値を使用すると良いでしょう。
- 訓練ジョブは作成後に削除できないため、
- Algorithm options
- Algorithm source: Amazon SageMaker built-in algorithm
- Choose an algorithm
- Vision - Object Detection (MXNet)
- Input mode: Pipe
- Resource configuration
- Instance type
- この投稿では
ml.p2.xlarge - GPU インスタンスのみオブジェクト検知アルゴリズムをサポートしています。
- この投稿では
- Instance type
- Job name
- Hyperparameters
- num_classes: この投稿では
1 - num_training_samples: マニフェストの行数と同じ値
- num_classes: この投稿では
- Input data configuration
- train
- Channel name:
train - Input mode:
Pipe - Content type:
application/x-recordio - Record wrapper:
RecordIO - Data source
- S3
- S3 data type:
AugmentedManifestFile - S3 data distribution type: FullyReplicated
- AugmentedManifestFile attribute names
source-ref- バウンディングボックスのデータを含むキー名
- S3 location: 訓練用の拡張マニフェストファイルの S3 URI
- S3 data type:
- S3
- Channel name:
- validation
- Channel name:
validation
- Channel name:
- train
- Output data configuration
- S3 output path: SageMaker が出力するモデルの S3 URI

Ground Truth によって生成された拡張マニフェストファイルのおかげで、 Pipe 入力モードと RecordIO を使用できます。
The augmented manifest format enables you to do training in pipe mode using image files without needing to create RecordIO files.
When using Object Detection with Augmented Manifest, the value of parameter RecordWrapperType must be set as “RecordIO”.
推論
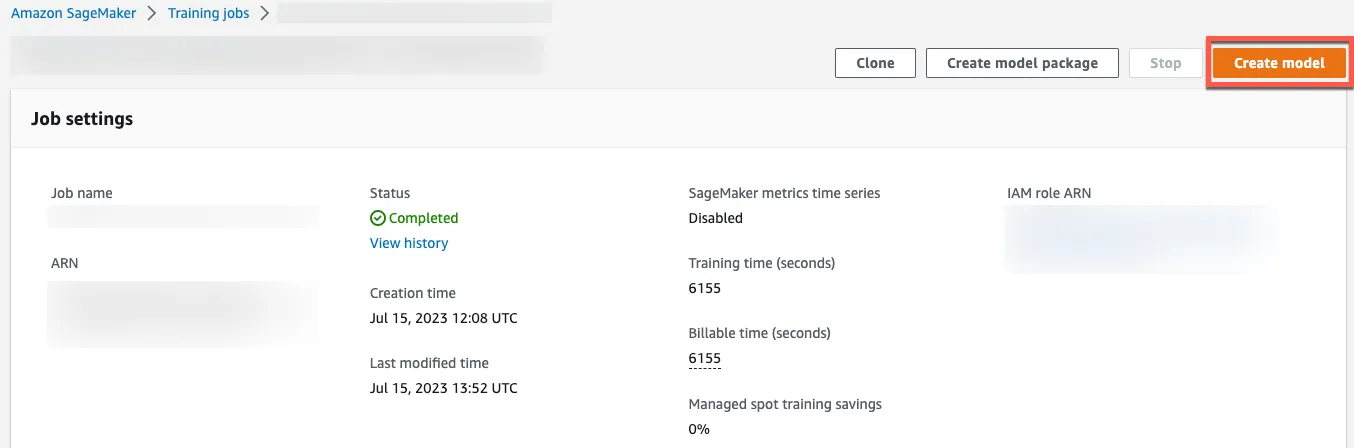
訓練ジョブからモデル作成
Create model をクリックして、訓練ジョブからモデルを作成してください。
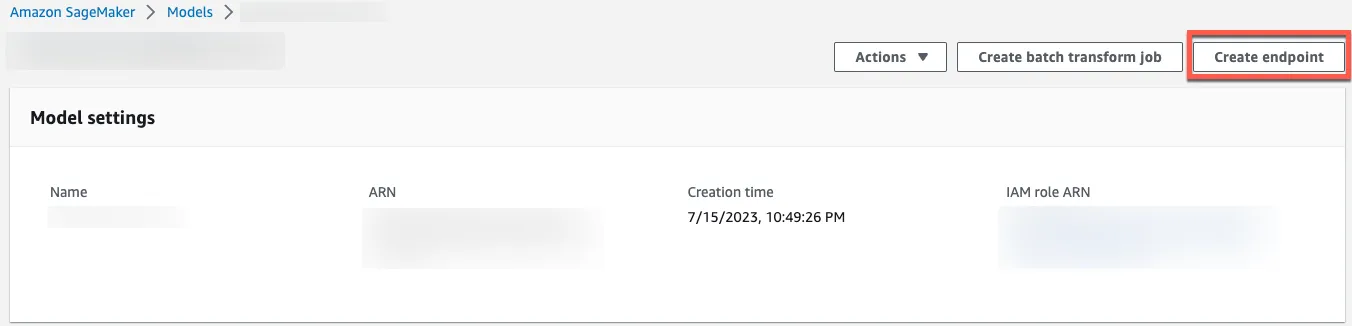
モデルデプロイ
Create endpoint をクリックして、モデルページからモデルをデプロイしてください。コールドスタートが許容できる場合、サーバーレスエンドポイントが、より費用対効果の高い選択肢になるかもしれません。
Serverless Inference is a cost-effective option if you have an infrequent or unpredictable traffic pattern. During times when there are no requests, Serverless Inference scales your endpoint down to 0, helping you to minimize your costs.
リクエスト生成
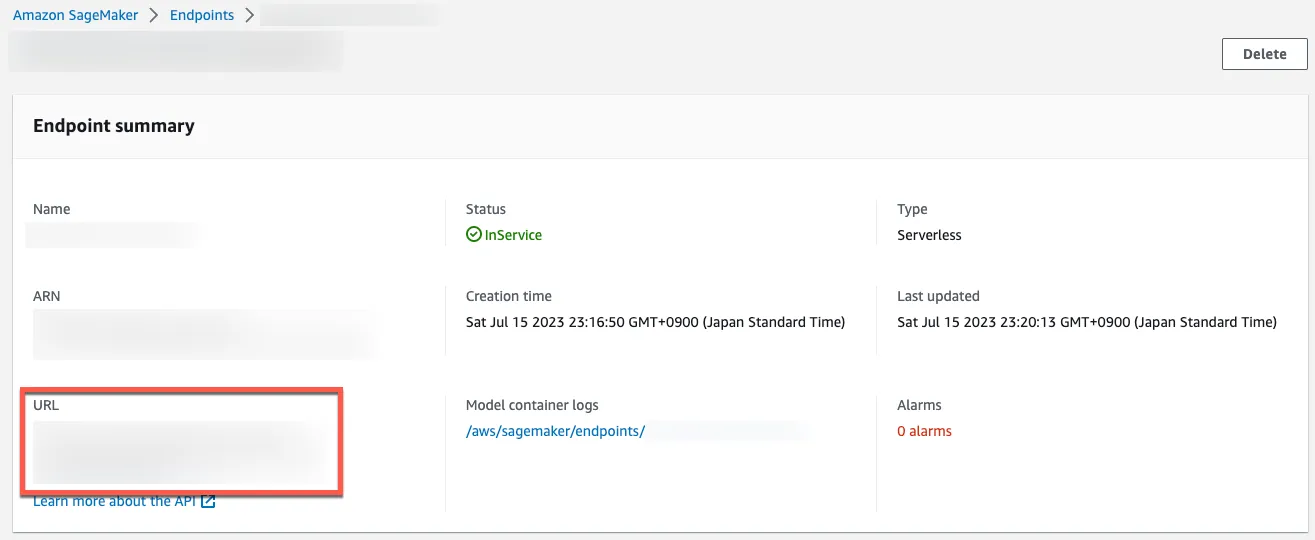
SageMaker 推論エンドポイント利用
エンドポイントの詳細ページに SageMaker 推論エンドポイントが記載されています。このエンドポイントは、 curl, Postman などのツールを使用して直接アクセスできます。
以下は Postman を使用した例の画像です。 AWS Signature V4 ヘッダーを生成するために、以下の情報を指定してください。
- AccessKey
- SecretKey
- Session Token: 永続クレデンシャルの代わりに、一時クレデンシャルの使用を強くお勧めします。
- AWS Region: SageMaker 推論エンドポイントのリージョン
- Service Name:
sagemaker
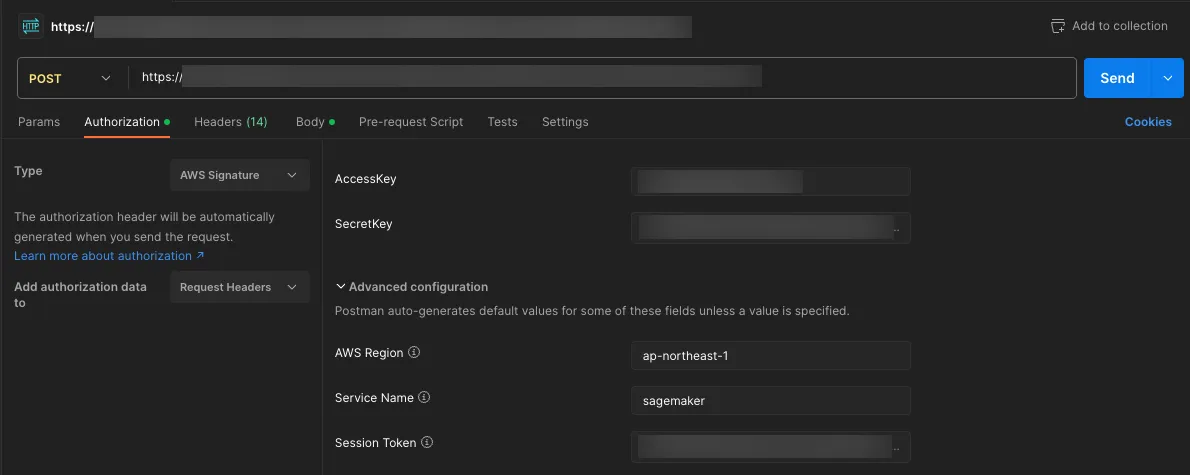
Accept: application/json ヘッダーを含めてください。
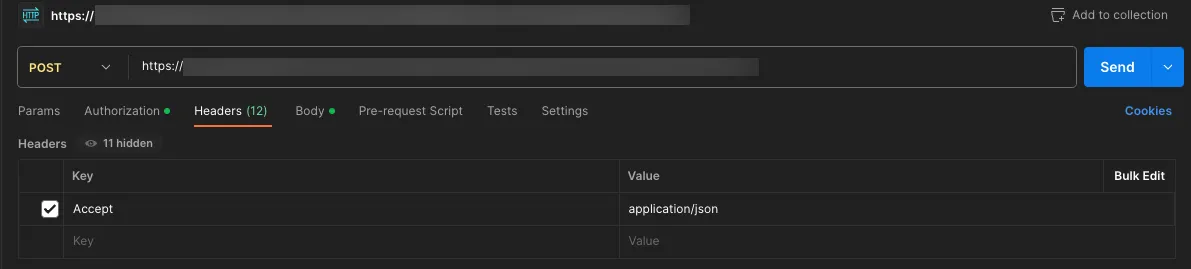
訓練されたモデルは入力としてバイナリデータを想定しているため、画像をバイナリ形式で送信してください。

AWS SDK (boto3) 利用
推論を実行するためには、 boto3 の invoke_endpoint API も利用できます。
import json

import boto3

runtime = boto3.client('sagemaker-runtime')

endpoint_name = '<YOUR_ENDPOINT_NAME>'
content_type = 'application/x-image'
payload = None

# Read an image
with open('/path/to/image.jpg', 'rb') as f:
    payload = f.read()

# Run an inference
response = runtime.invoke_endpoint(
    EndpointName=endpoint_name,
    ContentType=content_type,
    Body=payload
)

# The type of response['Body'] is botocore.response.StreamingBody
# See https://botocore.amazonaws.com/v1/documentation/api/latest/reference/response.html
body = response['Body'].read()

# Print the result
predictions = json.loads(body.decode())
predictions = json.dumps(predictions, indent=2)
print(predictions)

# Write the result to a file
with open('./response.json', 'w') as f:
    f.write(predictions)
推論レスポンス
推論レスポンス確認
推論のレスポンスは JSON 形式で、クラスラベル ID、信頼度スコア、およびバウンディングボックスの座標が含まれています。バウンディングボックスの座標は実際の画像サイズに対する相対座標であることに注意してください。
フォーマットの詳細については、公式ドキュメントをご参照ください。
{
  "prediction": [
    [
      0.0,
      0.9953756332397461,
      0.3821756839752197,
      0.007661208510398865,
      0.525381863117218,
      0.19436971843242645
    ],
    [
      0.0,
      0.9928023219108582,
      0.3435703217983246,
      0.23781903088092804,
      0.5533013343811035,
      0.6385164260864258
    ],
    [
      0.0,
      0.9911478757858276,
      0.15510153770446777,
...
      0.9990172982215881
    ]
  ]
}
推論レスポンス可視化
推論レスポンスを可視化するために、この投稿では Jupyter Notebook と matplotlib を使用しています。
import json

import matplotlib.patches as patches
import matplotlib.pyplot as plt
from PIL import Image

# Configure plot
plt.figure()
axes = plt.axes()

# Read an image
im = Image.open('/path/to/image.jpg')
# Display the image
plt.imshow(im)

# Read SageMaker inference predictions
with open('response.json') as f:
    predictions = json.loads(f.read())['prediction']

# Set initial count
count = 0

# Create rectangles
for prediction in predictions:
    score = prediction[1]
    if score < 0.2:
        continue

    # Count up
    count += 1

    x = prediction[2] * im.width
    y = prediction[3] * im.height
    width = prediction[4] * im.width - x
    height = prediction[5] * im.height - y

    rect = patches.Rectangle((x, y), width, height, linewidth=1, edgecolor='r', facecolor='none')
    axes.annotate(count, (x + width / 2, y + height / 2), color='yellow', weight='bold', fontsize=18, ha='center', va='center')
    axes.add_patch(rect)

# Display the rectangles
plt.show()